
Choosing emergency lighting for a hallway is not simply a matter of buying the brightest fixture. The goal is to keep the escape route visible when normal lighting fails. Emergency Lights In The Hallway should help people identify exits, stairs, turns, and changes in floor level. Picture a narrow corridor, a fire door, and a dim stair landing nearby. Small details matter. Not just brightness.
Start by checking the hallway’s length, width, ceiling height, surface finishes, and likely obstructions. Glossy walls can cause glare, while recessed doorways may stay shadowed. Compare light distribution and coverage, not only lumen figures. A neat specification sheet can still miss a dark corner. Check how each unit works during a power interruption, its stated battery runtime, and whether its indicators make routine checks clear. Maintenance access matters too; hard-to-inspect equipment can be neglected.
Follow the manufacturer’s installation and maintenance guidance. Local building and fire-safety requirements vary, so confirm applicable rules with a qualified professional before deciding on fixture locations or spacing. That step is easy to overlook. A suitable choice balances dependable performance, straightforward testing, and thoughtful placement. Consider who uses the building, from residents to visitors and staff. No single fixture fits every hallway. Review the route in low light, note weak spots, and verify the finished layout. One bright lamp may not solve everything. Emergency lighting is easy to treat as a checkbox. It deserves a closer look.
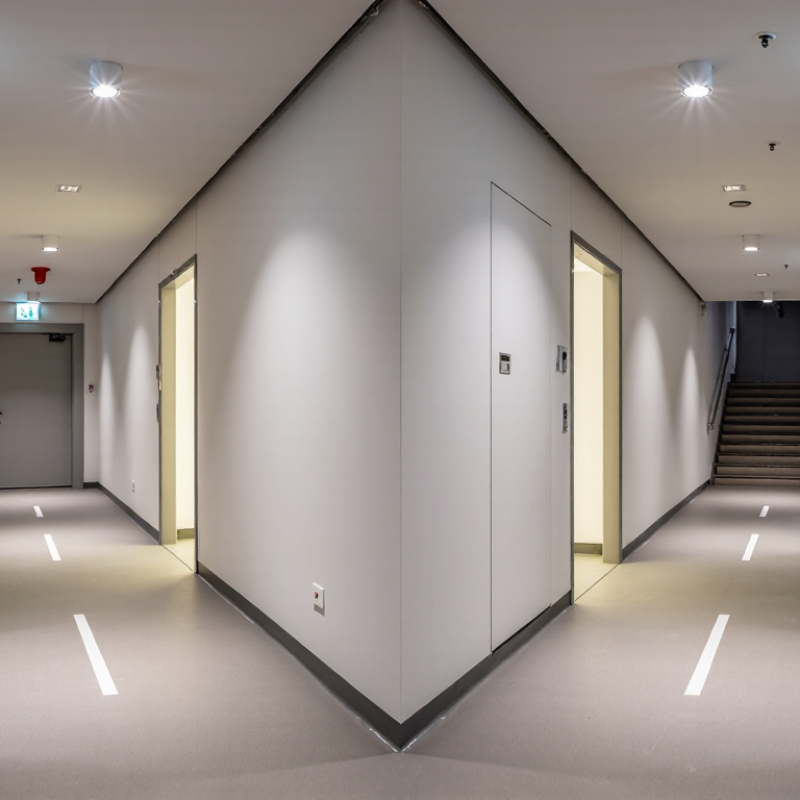
Emergency lights help people move through hallways when normal lighting fails. They reveal turns, doorways, floor changes, and obstacles that can become hard to see in darkness. Their purpose is practical: provide enough light for occupants to follow an exit route calmly. They do not replace exit signs or a clear, unobstructed corridor. A fixture near a stairwell entrance may matter more than one shining toward a blank wall.
Choose units by considering hallway length, ceiling height, corners, and nearby doors. A narrow corridor may need fewer fixtures than a long passage with alcoves, but spacing should be checked against the product’s coverage data. Battery runtime and charging indicators matter too. Follow the manufacturer’s instructions and applicable local requirements, and ask a qualified professional to assess uncertain layouts. One easy oversight is judging a light only while the mains are on. Test it in emergency mode; the actual coverage can look different.
Tips: Walk the route from both ends. Check dark corners and changes in floor level. Keep lenses clear, record routine tests, and replace units that fail. It is easy to miss one shadow. Recheck after renovations or furniture changes.
A hallway’s shape matters as much as its length. Note every turn, dead end, doorway, stair, and change in floor level. A straight corridor may need even coverage, while a narrow bend can leave a dark pocket. Check whether open doors, carts, or wall-mounted equipment could block light. Corners matter. Walk the route at night and imagine moving through it with the normal lights off.
Tips: Mark exits, stairs, and direction changes on a simple floor plan. Look for shadows beneath signs and around door frames. Check that emergency fixtures remain visible when doors are open. Keep it practical.
Consider the likely risks, too. A hallway near a kitchen, utility room, or busy entrance may need extra attention because smoke, clutter, or a power interruption can affect visibility. Select lighting that covers the full escape route, not just the exit itself. Confirm the required illumination level and operating duration against applicable building requirements; a qualified professional can help assess unusual layouts. Test fixtures regularly and record faults. One judgment may be off. Recheck after renovations, furniture changes, or new partitions.
Compare common emergency-egress illuminance criteria at the start of an outage and after 90 minutes. Use the minimum value as a prompt to assess darker areas, turns, doors, and other potential shadow zones in your hallway layout.
Common model-code criteria call for at least 1.0 foot-candle average and 0.1 foot-candle minimum initially, decreasing to 0.6 and 0.06 foot-candle respectively at 90 minutes. Requirements can vary by jurisdiction; verify local codes and measure illumination along the egress path.
Hallway emergency lights should match the building’s layout and backup-power plan. LED fixtures suit narrow corridors because they use little energy and need less frequent lamp replacement.
The U.S. Department of Energy reports that LEDs use up to 90% less energy and last up to 25 times longer than incandescent bulbs.
That can ease routine maintenance, but it does not prove a fixture will run long enough on its battery. Check the rated emergency duration and test the actual unit.
Self-contained battery lights are practical for retrofits: each fixture has its own backup, so a corridor can remain lit if one unit fails. The trade-off is more batteries to inspect and replace.
Central inverters or battery systems simplify centralized monitoring, but require suitable wiring and careful load planning. Generators can support wider areas, yet transfer time and regular testing matter.
NFPA 101’s life-safety provisions use a 90-minute emergency-operation benchmark; confirm the adopted local requirements for your building.
Keep it simple. Walk the hallway at night and look for shadowed doorways, stair entries, and changes in floor level.
I would still verify spacing on site—fixture charts cannot capture every obstruction.
Hallway emergency lights should reveal the route, door handles, and changes in floor level—not just appear bright. Compare photometric test results at floor level, especially at corridor ends and around corners. A high lumen rating alone can hide dark patches. Choose a unit with a battery runtime that covers the required evacuation period, and consider how aging batteries may reduce actual performance.
NFPA 101, Life Safety Code, specifies emergency illumination levels of 1 foot-candle average and 0.1 foot-candle minimum initially, with lower levels permitted after 90 minutes. Check the edition adopted by your local authority, since requirements can vary. For dependable operation, look for equipment evaluated to UL 924 and verify its test indicators, battery replacement guidance, and temperature range. Runtime claims are only useful when the battery is maintained and tested.
Tips: Walk the hallway after dark with normal lighting switched off. Check the farthest corner, stair door, and any glossy floor that creates glare. Ask for a spacing plan based on measured output, not estimates. Then schedule regular functional tests; a missed test is easy to overlook, and that is exactly where planning can fall short.
Plan emergency lighting around the hallway people actually use, not just the floor plan. Note doors, stairs, turns, and items that may cast shadows, such as tall cabinets. Place fittings so light reaches changes in level and escape-route signs remain visible. A bright patch beside a dark stair can still leave someone unsure where to step. Check spacing and mounting height against the equipment instructions and applicable local requirements. Small details matter.
Before installation, confirm that the power supply, wiring, and mounting surfaces suit the chosen fittings. Keep access panels reachable; a light that cannot be inspected easily may be neglected. After installation, test each unit using its test function, then check that it switches on and provides useful coverage. Walk the route at a safe time. Look for dark corners and glare. Record the test date, result, and any repair needed.
Set a regular testing schedule based on the manufacturer’s guidance and local requirements. During checks, look for damaged lenses, loose fittings, blocked light, and weak or failing batteries. Keep a simple log near the building’s maintenance records, and note who completed each check. Replace faulty parts promptly with compatible components. One imperfect habit is relying on a quick glance from the doorway; it can miss a dead unit around a bend. Walk the full hallway instead, and review the layout when partitions or storage change.
| Planning Area | What to Consider | Practical Guidance | Check or Record |
|---|---|---|---|
| Applicable requirements | Building use, occupancy, local fire and building codes, and the authority having jurisdiction. | Confirm required coverage, duration, illumination, test intervals, and documentation with the relevant local authority. Requirements vary by location and building type. | Keep the applicable code references, approvals, and emergency-lighting plan with the building records. |
| Hallway and exit route survey | Corridor length and width, turns, level changes, doors, stairs, obstructions, and final exits. | Mark the complete route to a safe exit. Pay particular attention to intersections, changes in direction, stairways, and exit doors. | Use an up-to-date floor plan showing fixtures, exit signs, distribution boards, and test points. |
| Light output and coverage | Required illumination along the escape route and visibility of hazards and exit signs. | Select fittings and positions based on a lighting layout, not simply on equal spacing. Check for shadows, glare, and areas blocked by partitions or doors. | Verify the design against local requirements and retain commissioning measurements where required. |
| Power and operating mode | Battery-backed, centrally supplied, or self-contained emergency luminaires; maintained or non-maintained operation. | Choose a system compatible with the building’s power arrangement and operating needs. Confirm that normal-lighting failure triggers the required emergency operation. | Record circuit identification, supply arrangement, operating mode, and the location of isolation devices. |
| Rated emergency duration | The period the system must operate after normal power fails. | Specify the duration required by local rules and the building’s evacuation plan. Do not assume one duration applies to every building. | Confirm the selected equipment’s rated duration and include a suitable duration test in the maintenance schedule. |
| Installation location | Mounting height, surface type, environmental conditions, and access for inspection. | Install securely and follow the equipment instructions. Avoid locations where fixtures may be obstructed, damaged, or difficult to maintain. | Inspect mounting, wiring, labels, and accessibility during installation and periodic checks. |
| Commissioning | Correct operation after installation, including charging and response to loss of normal supply. | Allow batteries to charge as specified by the equipment instructions before carrying out the initial functional and duration tests. | Document the commissioning date, test results, defects, corrective work, and responsible person. |
| Routine functional testing | Whether each fitting operates when normal lighting power is interrupted. | Carry out tests at the frequency required by local rules and the maintenance plan. A brief test checks operation but does not establish full battery duration. | Log the date, fixtures tested, failures, repairs, and any retest results. |
| Duration testing | Whether the system remains illuminated for its specified emergency period. | Perform duration tests at the required interval, following the manufacturer’s instructions and applicable local requirements. Plan testing to limit disruption and allow batteries to recharge afterward. | Record test start and finish times, affected units, results, battery condition, and follow-up actions. |
| Ongoing inspection | Visible damage, loose fittings, blocked lights, status indicators, and clear exit routes. | Include hallway emergency lighting in routine building inspections. Keep fixtures and signs unobstructed and replace damaged or failed components promptly. | Maintain a dated inspection and defect log, including the person completing each check. |
| Battery and component replacement | Battery condition, service life, compatibility, and evidence of reduced performance. | Replace failed or degraded batteries and other components with suitable parts in accordance with the equipment instructions. Re-test after repairs. | Record component details, replacement date, test results, and any warranty or service information without relying on a brand name. |
| Change management | Renovations, new partitions, changed occupancy, or alterations to hallway layouts. | Review emergency-lighting coverage whenever an escape route, room layout, or building use changes. | Update floor plans, risk assessments, test records, and approvals after changes. |
Note every turn, doorway, stair, dead end, and floor-level change. Mark them on a simple floor plan. Corners matter.
Walk the route at night with normal lights off. Check shadows beneath signs, around door frames, and beyond narrow bends. I may miss something on one pass.
Yes. Open doors, carts, and wall-mounted equipment can block light. Check whether emergency fixtures stay visible when doors are open.
Look closely near kitchens, utility rooms, and busy entrances. Smoke, clutter, or a power interruption can reduce visibility there.
They use relatively little energy and often need less frequent lamp replacement. Still, check each fixture’s rated backup duration.
Individual battery fixtures provide separate backup, but each battery needs inspection. Central systems simplify monitoring and require suitable wiring and load planning.
A 90-minute benchmark appears in some life-safety guidance. Confirm the requirement that applies to your building and test the actual fixtures.
Test fixtures regularly and record faults. Recheck after renovations, furniture changes, or new partitions. Small changes matter.
Choosing Emergency Lights In The Hallway begins with understanding their role in helping people find a safe route when normal lighting fails. Consider the hallway’s length, width, turns, stairs, exits, and potential obstacles, as well as how many people may need to move through it. These details help determine where lights should be placed and how much illumination is needed for clear visibility.
Compare suitable light types and power sources, then assess brightness and runtime to ensure lighting can remain useful during an outage. Look for dependable operation, clear status indicators, and features that support applicable safety requirements. Before installation, plan coverage to reduce dark spots and keep pathways visible. Afterward, test the system regularly, check batteries and components, and arrange prompt maintenance when needed. Thoughtful selection and upkeep can help make hallway lighting more reliable when normal power is unavailable.
